Showing posts with label projects. Show all posts

02 November 2011

Kai's Knit Baby Blanket Pattern: Pavilion Stitch

Recently I made a knit baby blanket for Kai, our friends' Kevin @ Rhetorician by Trade and Rachel's @ 52 Projects first baby boy.

 
and thought I would share the pattern I created with you in case you want to make one too!  I used pavilion stitch because it looks super cool and it is a fun pattern for beginners because you only use regular knit and purl stitches.


Here is the PATTERN:

Supplies:
Size US 10 24" or greater circular needle (or two long needles if you prefer, I like circular because you never lose one!)
Four Medium size Skeins of Yarn of your choice (if you use smalls skeins you will need more, if you go with a super saver size you might only need two)
Optional: A yard of minky fabric to line the back to make it extra cozy

Get Started:
Cast on 80
Rows 1-8: Knit
Row 9: K4, [k2, p1, k5, p7, k3: rep across] end K4
Row 10 and all even rows: K4,[Knit the knit sts and purl the purl sts as they face you] end K4
Row 11: K4, [(k1, p1) twice, k5, p5, k4: rep across] end K4
Row 13: K4, [p1, k3, p1, k5, p3, k5: rep across] end K4
Row 15: K4, [k5, p1, k5, p7: rep across] end K4
Row 17: K4, [(p1, k5) twice, p5, k1: rep across] end K4
Row 19: K4, [k1, (p1, k5) twice, p3, k2: rep across] end K4
Row 21: K4, k2,*p1, k5; rep from *,end p1, k7
Row 23: K4, [k3, p1, k5, p1, k3, p1, k1, p1, k2: rep across] end K4
Row 25: K4, [k4, p1, k5, p1, k1, p1, k3, p1, k1: rep across], end K4
Row 27: K4, [k5, p7, k5, p1: rep across] end K4
Row 29: K4, [p1, k5, p5, k5, p1, k1: rep across] end K4
Row 31: K4, [k1, p1, k5, p3, k5, p1, k2: rep across] end K4
Row 33: K4, [k2, p7, k5, p1, k3: rep across] end K4
Row 35: K4, [k1, p1, k1, p5, k5, p1, k4: rep across] end K4
Row 37: K4, [p1, k3, p3, k5, p1, k5: rep across], end K4
Row 39: K4,[k5, p1: rep across] end K4
Row 41: K4,[k4, p1, k1, p1, k3, p1, k5, p1, k1: rep across] end K4
Row 43: K4,[(k3, p1) twice, k1, p1, k5, p1, k2: rep across], end K4
Row 44: K4, [Knit the knit sts and purl the purl sts as they face you],end K4
Repeat Rows 9-44 2 more times (3 total)
Knit Last 8 Rows
Cast Off
Weave your yarn tails through your knitting to hide them. 


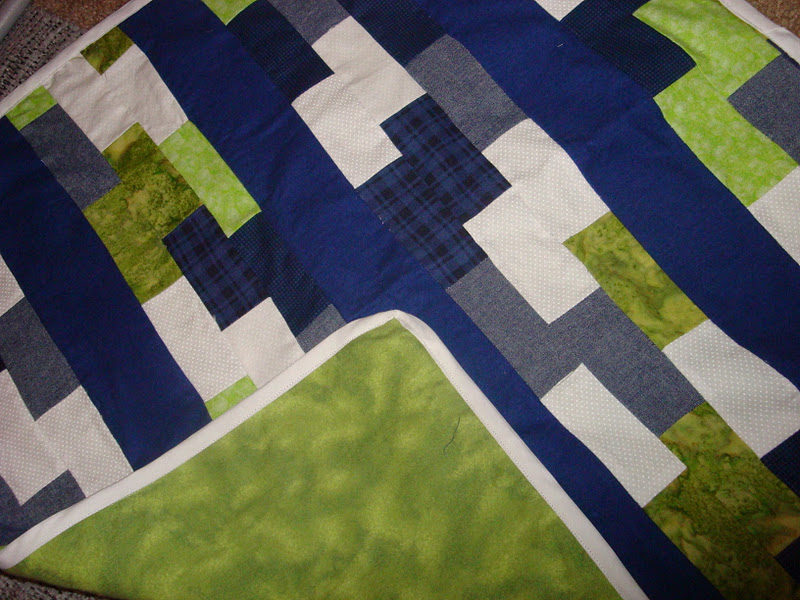
*Optional* I sew minky (or flannel) onto the back of my knitted blankets because generally only one side looks good. This particular pattern doesn't look bad if you leave it, but for a winter baby the extra softness and warmth will be appreciated. Simply cut your fabric to the size of the blanket and fold under edges (I use the border as a guide). Then blanket stitch the edges of the fabric to your knit blanket. To keep the fabric and the knit blanket together I add some hand ties (like quilting). I think these extra steps are worth the time and energy!


I hope you enjoy the pattern!

30 October 2011

Toss Pillow Make-Over

After visiting the apartments of some friends I felt inspired for a new upgrade for our apartment.
 A long time ago we added bright yellow to our original black, white and turquoise color scheme. But our family room lagged behind and looked kind of thrown together. 

 Easy upgrade? PILLOWS! (Plus I scored 4 new ones for 2 bucks that needed recovering) 
I just used some scraps that I had in my stash and I think they are a fun update. 
 Poor Dom, I just keep bringing more pillows into our life!
And I did a little upgrade in our bedroom as well. Our color scheme in there is pretty much neutrals and a pale ocean blue. 

28 October 2011

Project Mania: Boppy Cover, Lap Blanket, and Pillow

Here are the last few projects for the nursery:
Pillow for our glider. I got the form for fifty cents, the fabric was left over from the bulletin boards and the buttons I fished out of a jar full I bought at the swap meet. 

 
We have a LOT of blankets, our baby will seriously NEVER be cold! But when I saw the cutest baby sitting in front of us in church the other day with a tiny lap blanket, I couldn't resist. So I used scraps from the puff quilt, my grandma-made quilt and a little flannel I had around. 

And the last project was a cover for my boppy pillow, I used the free pattern here (it was a little big for my taste, if you want it tighter be sure to cut it smaller. 
It has white flannel on one side, plain grey cotton on the other and some fun turquoise piping. 

23 October 2011

Easy Knit French Press Cozy Pattern

Dom asked me to make a cozy for our french press, to keep our brew warm. 

I used some scrap wool yarn I had lying around in dark grey and neon green. And some awesome vintage buttons from Dom's mom. 
So I knitted it a little sweater inspired by the pattern here. Using this pattern I ended up with a cozy that was way too big so I had to recreate my own:

Supplies
a size 5 circular knitting needle (or two sticks if you prefer)
Yarn scraps or a small skein (I used a lightweight wool)
3+ Buttons of Choice

Pattern:
Cast on 50 stitches
Knit in K2, P2 for 4 rows
Switch colors and knit in stockinette for 4 rows
Switch colors and knit in stockinette for 4 rows. 
repeat until you get to desired length. (I knitted 36 rows of stockinette in all, 9 panels of color)
Finish knitting in K2, P2 for 4 rows and cast of loosely.

I sewed loops of yarn on one side and buttons on the other. 4 was a perfect number of buttons for me, but more could be cute too! I think 3 is the least you could have.

If you choose to do this in all one color, you just skip the color switching.

17 October 2011

Finally Grown-Up

For the first time in our lives we OWN a washer and dryer! 
(que the applause)

We had to sacrifice one of only two closets to squeeze it in, but it was worth it. Storage may be a little tighter, but this is glorious! And since we already converted Dom's office into a nursery we are getting pretty good at utilizing every inch of space we have. 

This is our friend Chris and his son helping us install them, believe it or not Dom is also in this picture. 
...and speaking of utilizing every inch of space... 
 

No more lugging load after load to the laundromat (or dorm laundry facilities)!!!
 And now to prepare my laundry station. One of my secret loves is laundry.
 Super pumped to set up all my stain fighting potions!\

Do you love laundry? Check out
'Laundry the Home Comforts of Caring for Clothes and Linens' by Cheryl Mendelson
LOVE IT!

04 October 2011

Project Mania: Bird Mobile

Long ago I mentioned a family project in progress, the Bird Mobile

It was conceived as a glimmer of an idea. 

Was grown over time...

and invitations were sent out to grandmothers, aunts, friends that are nearest to family as you can get. 


Then they began to arrive. One by one. 
From:
Ohio
Michigan
Virginia
Illinois
So- Cal

Branches were meticulously chosen. 
Engineering was discussed in length with Grandpa Mike. 

And then the real task began. Construction was at times frustrating and confusing. 
I left it once or twice. The experience stretched me. 
But it all came together beautifully. 
TA DA!
  

The top branch are all of the 2nd Aunties (the greats, the honoraries)

On one side are all of Dom and my aunts..

Aunt Lynda is up there on top
 
Aunt Suzanne, Aunt Nancy and Aunt Patti

On the other side are all the Honorary Aunties:
 
Kendra and Stacey


Jen, Laura and Rach are all cuddled together.

 
And his Aunt Rachelle is the next tear down, on her own little branch.

Then come the grannies.

His Great Grandma LuLu

and His Grandmas Terri and Cheryl.

  And the closest to his little face, of course is his mama!

Here is his point of view. 

It was an awesome experience. And I am so incredibly blessed by each person that took the time to send in a bird. THANK YOU for your love and excitement for this little one!

01 October 2011

Project Mania: Puff Quilt, Part: The Last

Quilting is not my forte. But I love projects that expand my horizons. So when I saw the puff quilts over at HoneyBear Lane I was hooked.  (I love every quilt she makes they are so amazing!)

She even did a baby gym makeover with a puff quilt! I loved this idea and had originally wanted to do this, but of course ideas shift. 

I downloaded her tutorial and got to work. 
You can see the progression here and here

And finally I was finished, and it really was not as hard as anticipated.

 I think it will make a great play mat since it is all soft and cushy. 

 The only thing I changed was that I added some tags around the edge of the puffs for clipping on toys or for baby to just play with and chew on and I quite like them. 
 For now it is hanging out in his bassinet, waiting for his arrival. 

29 September 2011

Project Mania: Chevron Fabric

Sometime early this summer I found an amazing neon green and white chevron fabric (note the new blog background). Dom was not super into it, probably because I wanted to essentially drench the baby room in it. 
I can be a little over the top. 
Despite his distaste I bought a few yards and regretted not getting more. Now mind you I had no plans for it. Just that I loved it and no amount would be enough. Plus it was like 2 or 3 dollars a yard. 

 I hung it on the wall by a couple nails and paper clips just for inspiration and there it stayed for weeks. At times I wished that I had more so I could cover the wall with it.


Then I remembered the bulletin boards my dad made me out of ceiling tiles, wish I had pics somewhere. Ceiling tiles are the ABSOLUTE best bulletin boards, way batter than the standard cork kind, they are tons thicker and seem to take the abuse of constant mutilation with pins way better and can hold heavier objects.  Plus they are so cheap, you feel free to do whatever to them. I have painted mine, covered them in fabric and ribbons and when all is over you can toss it away if you want. 

So if you want an easy and cheap bulletin board, pick up a ceiling tile, or do like my dad did when he was young and tile an entire wall with it.

If you choose to go with paint, it is super easy just paint it with whatever you have got. Then for wall hanging you can screw or nail directly to wall, hot glue it, or get picture hanging hooks if you want to be legit. I recommend hot gluing the hook onto the board, it’s a little more secure than a tack nail would be.

Or you can cover it in fabric. Simply cut your fabric about 6 inches larger than your tile and pull the excess over the back and hot glue down. And presto! You are done. Now for hanging I decided to use some fun ribbon to hang them. Not totally committed yet, they could still be tweeked in the coming weeks. But if you like the ribbon hanging all you have to do is hot glue it to the back. Use a good big glop of glue to make sure it holds well.


I hope someday when you need a bulletin board you take my word for it and make your own. You really will love it!

Also you just got a sneak peak of the bird mobile!

27 September 2011

Nursery Update

Last glimpse you had of our nursery was this....from our weekly belly series six weeks ago. 
 We had our bassinet ( my dad refinished it, it has been in our family since my Great Grandmother. A prized possession in my life)
Some birds were in from the mobile (over on the window sill), our glider slipcover was half done, and I was still trying to figure out what to do with the wonderful chevron fabric. 
I was thinking about a navy wall, which would probably be amazing, but also really dark in our usually too dark place. So I have since abandoned the idea. 

Well, the fabric turned into bulletin boards... they still have some tweeking ahead of them I think. 

and the Bird Mobile is FINISHED!
(more on that topic)

Here are some cuddly stuffed animals from Auntie Rachelle (looks like her dog Daisy), the O'Donnell Family, and Dominic gave me one as a first baby gift. 

Ok this swing was a long time coming.
 I really really don't like typical baby colored stuff. You know the kind with obnoxious colors and freaky looking animals. If you love the abundance of colors, great! Babies probably love it too! But it drives me crazy to look at in such a small apartment. And I worried about baby colors taking over our lives. 

When searching for a swing I wanted a small version, for our mini place, that could both swing and vibrate. There are few options. Ok, there is only 1 and it comes in the before mentioned crazy animals with primary colors. I was just going to give in and buy it and attempt to make a new cover, or force myself to buy a cute one that was just swing or just vibrate. Until I discovered the swing that changed my life forever. 
(que angels singing)
It works with almost any infant car seat (Graco is the only recommended brand by the manufacturer, but our Baby Trend...as pictured... fits perfectly). It is just a frame with swing, vibration, and sound options. It's small and folds for easy travel (as that is what it is intended for). I love that baby can go straight from car to swing if need be. 

Back to more updates. I found this wonderful super heavy upholstery fabric the same day as the green chevron and it has now become a rug. 
Baby's dresser: paint chip art, a gift I can't unwrap because it is too pretty, a scrapbook of stuff from the showers and ultrasound pics, a basket full of grandpa-made wooden blocks, and Grandpa's Dam Doll (don't ask). 
Side note, sweet Detroit Tigers Pacifiers from Uncle Neil!
Lets call this corner the reading and feeding space. (The Boppy has since gotten a little facelift, with a custom cover...should have taken an hour, but took like four, I hate when that happens. If only I didn't have to have piping!)
This banner was an unexpected addition, it came from the shower thrown by our friends here at Monte Vista. A creation by Cheryl Sharp, decorator and artist extrordinaire. Dom and I both love it hanging over the window (Takes a little away from the ugly vertical blinds).

I am thinking a full tour by video sometime in the near future!